I believe every car owner has experienced such frustrating moments: accidentally scraping the wall corner when opening the door while parked, getting hit by flying stones on the road, or inexplicably finding a scratch from nowhere. These uninvited "scars" not only spoil the car's appearance, but if left unattended may lead to rust on the body panels. Yet taking it to a 4S shop or repair garage often costs several hundred or even over a thousand yuan, which is truly painful to bear.
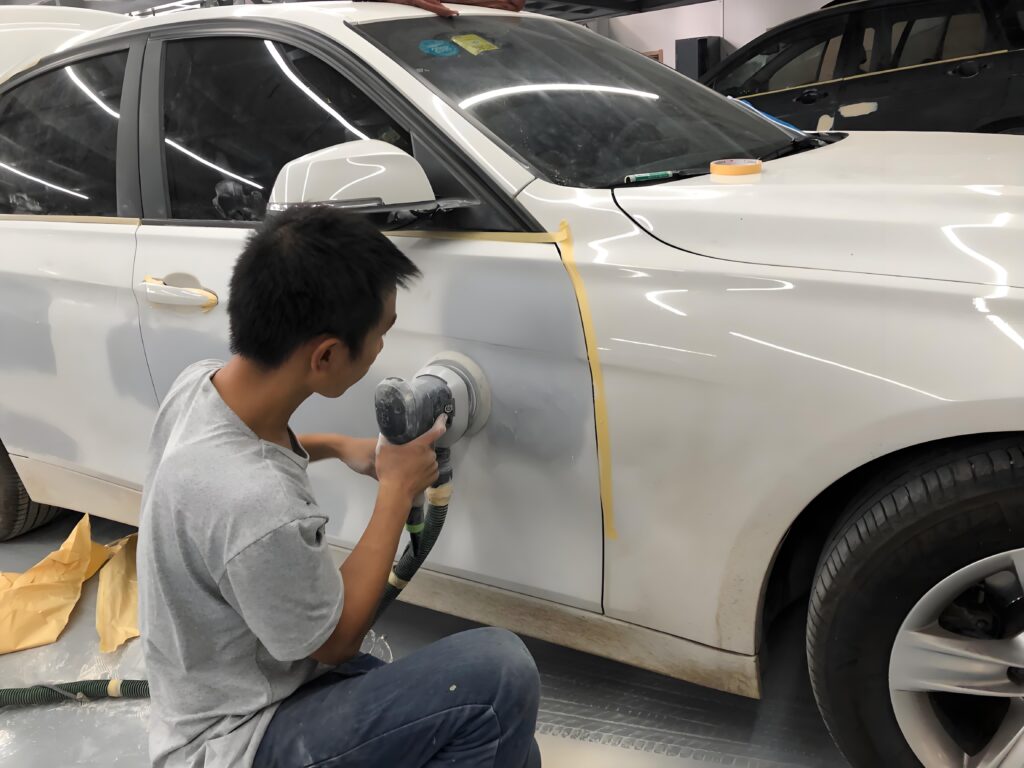
Actually, for small-area paint damage, you don't need to spend so much at all. Today, we'll reveal the professional paint repair process and simplify it into three easy-to-understand steps. Once you master this skill, you'll not only save a considerable amount of money, but also enjoy the satisfaction of personally making your car look brand new!
Core Repair Philosophy: Layered Treatment, Professional Results
Professional paint surface repair is not simply applying paint; its essence lies in "layered treatment." The entire process can be vividly compared to "giving the car's skin a spa treatment" : first clean the wound, then fill and repair, and finally apply makeup and set it. By following these three steps, you too can achieve a near factory-finish result.
Step 1: Sanding Smooth — Laying a Solid Foundation for a Perfect Repair
Core Objective: Remove burrs and rust, and create smooth transition areas to ensure subsequent coatings adhere perfectly without leaving any traces.
- Cleaning and Assessment: First, thoroughly clean the damaged area to ensure it is free of sand, mud, and oil. Carefully inspect the extent of the damage; if accompanied by slight dents, use sheet metal repair tools for initial leveling.
- Fine sanding: Use sandpaper of grades P320 to P800 (depending on the depth of the damage), and sand from the inside out, centered on the scratch. The key is to grind the "cliff" at the edge of the chipped paint into a smooth "slope"—this technique is called "featheredging." The sanded area should be slightly larger than the damaged area, forming a smooth transition zone. This is the most critical step to avoid a "patchy" look.
- Cleaning and Masking: Use an air blow gun and a dedicated cleaning cloth to thoroughly remove dust generated from sanding. Then use masking paper and tape to protect the surrounding body parts of the repair area to avoid contamination during spraying.
Step 2: Layered Spraying — Restoring the Original Factory-like Luster and Texture
Core objective: Achieve the multiple effects of rust prevention, color matching, and brightening through the three-layer overlay of primer, color coat, and clear coat. Remember the nine-character formula: "Primer prevents rust, color coat covers, clear coat brightens".
- Spray primer: The primer is the "loyal guardian." Its main function is to prevent the metal substrate from rusting and to provide a uniform, highly adhesive base for the subsequent topcoat. Evenly spray 1-2 layers of epoxy primer, fully covering the sanded area.
- Spraying basecoat: The basecoat is the "artistic restoration." After the primer is completely dry and lightly sanded, begin spraying the basecoat. The trick is "thin coats, multiple passes"—apply a thin layer each time, wait 2–3 minutes for the solvent to flash off, and repeat this process until the color is fully covered and matches the surrounding OEM paint with no color difference. This effectively avoids sagging (paint running) and color mismatch.
- Spraying clear coat: The clear coat is the "radiant outer garment." It is the key to determining the final gloss and durability of the paint surface. The spraying range of the clear coat should be slightly larger than the base coat area to ensure a perfect blend. Similarly, apply in 2-3 thin layers, and you will immediately see the repaired area regain its original luster.

Step 3: Polishing and Blending — Achieving the Final Mile of "Seamless" Restoration
Core Objective: Eliminate minor defects that may occur during painting, so that the new and old paint surfaces are fully blended in terms of gloss and texture.
- Wait patiently: After spraying is completed, the paint surface needs to be given enough time to fully cure (natural drying or low-temperature baking).
- Wet sanding and polishing: After curing, the paint surface may have a slight "orange peel" texture. At this point, use P2000 to P3000 finishing wet sandpaper with abrasive for full wet sanding until the surface is completely smooth. Then, use a polishing machine and polishing compound to polish the repaired area and surrounding regions. The steady movement of the polishing machine will bring out the deepest mirror effect of the paint surface, making the repair boundary completely "disappear".
Conclusion
Look, car paint repair is not as mysterious and difficult as imagined. Through "sanding, painting, polishing" these three systematic steps, you are fully capable of solving these minor troubles by yourself. The high repair costs saved can be used to buy a beloved gift for your family, and this joy is doubled.
Mastering more hardcore knowledge on car maintenance and usage not only protects your wallet but also makes you the "car expert" in your friends' eyes. Follow us now to unlock more money-saving car care secrets!