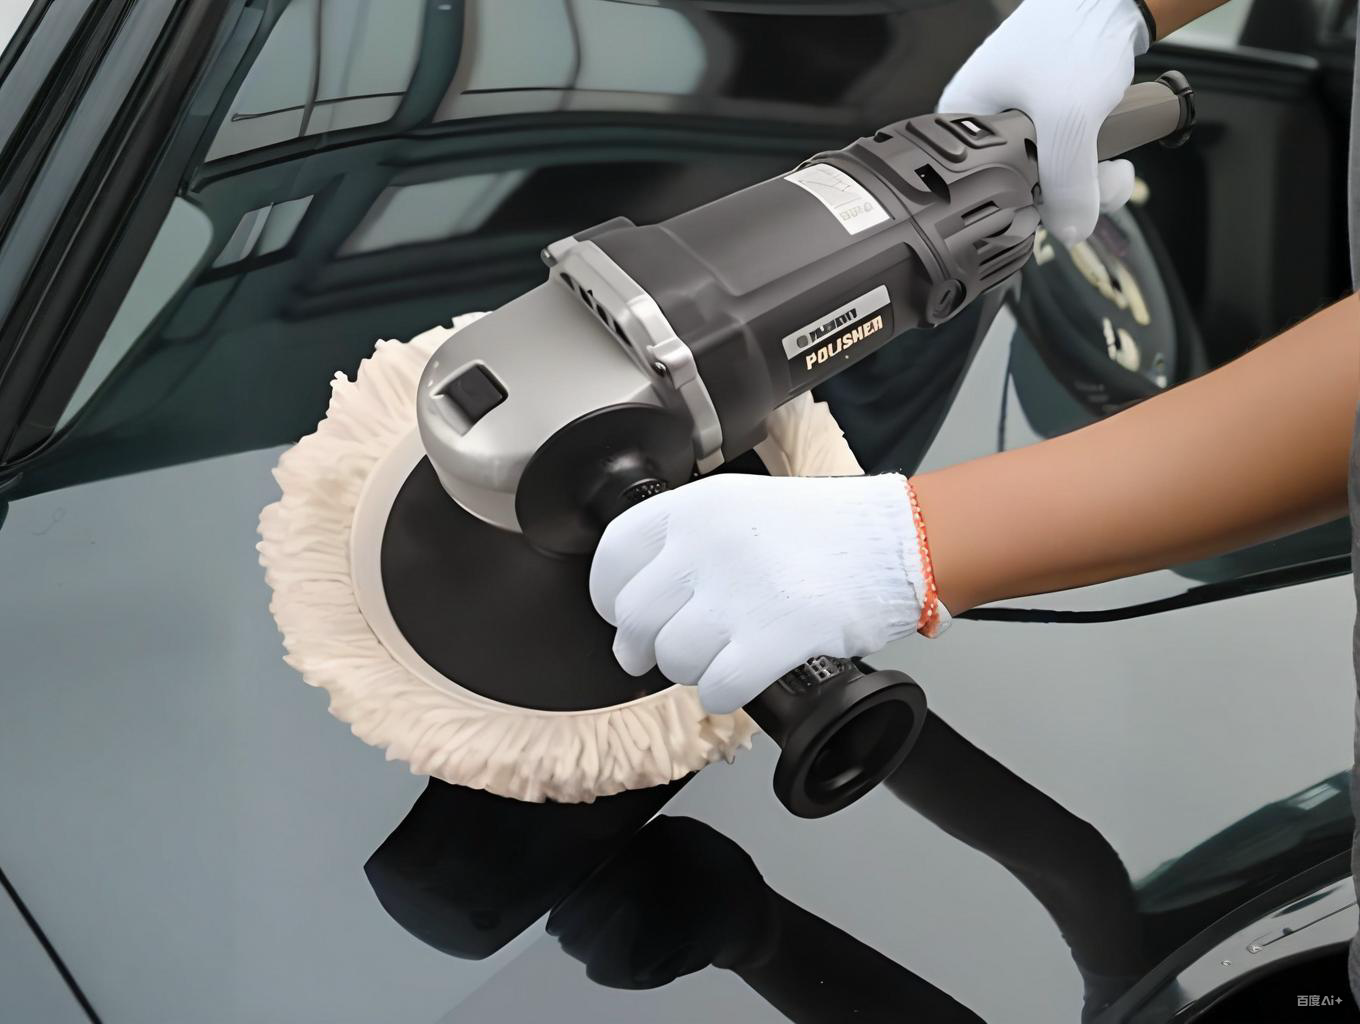
Automotive clearcoat wet sanding and polishing is the finishing pair used in refinish paint and plant post-paint operations: wet sanding cuts level the surface with water-lubricated P1500-P3000 abrasive papers to remove orange peel, sags, nibs and dust blemishes within the clear layer, while polishing (machine compounding with progressively finer abrasives) erases the sanding haze and restores specular gloss. Both steps consume clearcoat only, so the whole process has one governing constraint: the defect depth must be smaller than the remaining abrasion budget.
TL;DR — Measure before cutting: OEM clearcoat typically 35-55 um on a 100-150 um total film, so plan the entire sequence to spend at most 10-15 um. Walk the ladder P1500 level - P2000 refine - P2500 pre-polish - P3000 final, then cut and finish with staged compounds. Prefer a dual-action orbital machine, keep surface temperature under 50-60 °C to prevent holograms, and accept with ISO 2813 60-degree gloss and DOI, not lamp-glamour alone.
Key data
- OEM film build: total coating commonly 100-150 µm with clearcoat 35-55 µm; refinish 2K clear is sprayed to roughly 40-60 µm. Map thickness at fixed gauge points before the first cut.
- Grit ladder (abrasive-industry guidance): P1500 levels orange peel and light runs, P2000 refines the scratch pattern, P2500 pre-polishes, P3000 leaves a uniform haze a finishing compound can take out. Soak paper 10-15 min; sand with water plus a drop of wetting agent.
- Removal budget (film-gauge practice): a full-panel wet sanding pass takes about 3-8 µm off high spots, a cutting compound pass about 2-5 µm, a finishing pass ≤1 µm. Stop the sequence with ≥20 µm clear left.
- Machine windows: dual-action (DA) orbitals run roughly 3000-7600 orbits/min with 15 or 21 mm throw and self-limit heat; rotary buffers run 600-2200 rpm with faster cutting and higher skill demand.
- Thermal boundary: acrylic-polyurethane clears soften sharply above about 60 °C surface temperature; fine abrasives plus heat and stiff pads press periodic micro-grooves 0.1-1 µm deep—visible as holograms on dark, high-DOI finishes.
- Acceptance metrics: new-car clear reads ≥85 GU at 60° (ISO 2813); distinctness of image (DOI, ASTM E430) recovers as scratches leave; the water-wipe check must show no ghost scratches before hand-over.
Triage first: is the defect inside the clearcoat?
Three field tests
Fingernail drag: a catch that survives a wet wipe means the scratch approaches or breaches the clear. Water bead: a defect that vanishes when wet sits within roughly 5 µm of the surface—firmly in wet-sanding territory. Thickness differential: gauge the defect zone against adjacent panels; a locally thin film means previous polishing has already eaten the budget.
Cases that route to respray
Widespread chalking or greying (aged clears often hold under 15 µm), any burn-through into a metallic basecoat (flake orientation cannot be re-created locally), pearl panels sanded in isolation, and refinish blend edges. On these, polishing worsens the look; local or full-panel respray is the corrective.
The step chain
- 0 Clean and mask: clay the surface, tape off trims and plastics.
- 1 Level (P1500): sanding block or DA with hooked mesh disc; flatten peel and runs with light passes.
- 2 Refine (P2000): even the scratch pattern; keep the surface flooded.
- 3 Pre-polish (P2500): shallower scratches, frequent spray and wipe.
- 4 Final (P3000): uniform matte haze over the whole panel.
- 5 Cut: DA + medium-foam pad + stage-1 compound erases P3000 scratches.
- 6 Finish: soft pad + fine polish lifts gloss; wipe with IPA and inspect under LED.
Machine routes compared
| Route | Typical settings | Cutting power | Heat & hologram risk | Best for |
|---|---|---|---|---|
| Dual-action (DA) orbital | 3000-7600 opm, 15/21 mm throw, 125-180 mm pads | Medium | Low; self-stalling action | Waterborne base + 2K clear, busy shops |
| Rotary | 600-2200 rpm, 125-180 mm pads | High | High without constant motion | Hard OEM clears, deep defects, skilled hands |
| Hand block | By feel, wet paper | Low | None; risk of finger marks | Edges, mirror caps, spot correction |
Parameter discipline
- Start DA at the low-middle band with pad weight plus fingertip pressure; work patches of about 0.5 m² and cross-check with an IR thermometer—let the panel fall below 35 °C before moving on.
- Compound grits are staged: cutting abrasives work in the ~10 µm class, mediums about 3-8 µm, finishes ≤3 µm (some with nano-polished oxides). Skipping a stage guarantees a visible ghost of the previous scratch.
- Never wet-sand a soft clear: 2K refinish clears must be fully crosslinked—see the flash point and cure-window notes in our 2K clearcoat article; uncured film pills up on the paper.
- On metallics and pearls sand only with the panel's full course direction planned; flake and pearl orientation is destroyed by localised thinning (see flake orientation).
Holograms and burn marks
Why they appear
Holograms (marring) are directional light scatter from 0.1-1 µm periodic grooves pressed into warmed clear: soft 1K clears, fine polish with a stiff pad, high speed and dwell together. Burn marks go deeper—local heat softens or blisters the film and can discolour it.
Prevention and repair
Prevent with the soft-pad set: fine polish, low speed, light pressure, constant travel, cool between passes; trial a hidden corner first. Remove shallow holograms by re-laying the last two stages (P3000 then cut/finish) or a single fine-polish pass on a microfibre pad; a blistered burn is coating damage and routes to respray.
FAQ
Can a new car's factory finish be wet sanded?
Yes, within limits: healthy 35-55 µm clear, defects inside it, fine papers from P2500 and a ≥20 µm residual plan. Fresh clears keep curing for weeks, so within about three months of delivery stick to polishing rather than aggressive sanding.
Can machine (dry) sanding replace wet sanding?
In refinish, yes—hooked dry discs with extraction cut faster—but they leave a coarser scratch than the same FEPA grade wet, adding a polishing step. A wet final pass is still the industry choice because water flushes swarf and prevents secondary scratching.
Why do rings appear after polishing under strong light?
Textbook holograms: too fine an abrasive with too stiff a pad, or too much heat. Drop to a microfibre pad with finishing polish, halve the pressure, slow the machine. On soft 1K panels, consider respraying in 2K rather than chasing the defect.
When can I wax or seal after the job?
Wipe the panel with diluted IPA to lift oil and polish residue, let gloss stabilise, then apply protection. Freshly sprayed panels follow the refinish cure schedule—commonly about 30 days before waxing so trapped solvents do not disturb crosslinking.
A silver car is scratched—full panel respray?
Not automatically. If the scratch disappears when wet it lives in the clear: wet-sand and polish. If the basecoat is breached, aluminium flake orientation cannot be rebuilt locally; partial repair is a compromise, and delivery-grade results need a full panel or a blend back to the next break line.
How does a body shop make this repeatable?
Three habits: record gauge-point thickness with each work order, wall the grit/machine/compound matrix (the two tables above), and audit hand-over with a 60° gloss meter plus DOI board against the reference panel.
Last updated: 2026-09-26
References: eQualle/Aurus wet-sanding grit guide (2025); 3M, Koch-Chemie and Spies Hecker refinish polishing bulletins; ISO 2813 (60-degree gloss); ASTM E430 (DOI); FEPA/ISO 6344 grit grading.
Kexin New Materials (Guangdong) Co., Ltd.